Creating a Visual AfterSales Workflow Framework for New Hire Onboarding
Overview
During my time as a Delivery Specialist leading new hire onboarding, I identified a recurring gap between what new hires knew and when to apply that knowledge. Our process documentation for AfterSales resolutions is thorough, requiring learners to mentally stitch together steps, handoffs, and decision points on their own. The result was cognitive overload and low confidence heading into independent work.
With this in mind, I designed a solution from scratch: a reusable visual workflow framework, sketched by hand and built in Adobe Creative Cloud, that gave new hires a consistent way to read and navigate AfterSales cases no matter what stage the case is at when they pick it up.
New hires consistently understood how to start an AfterSales assessment and case review, however they struggled to know how to action an in progress case. Meaning, how to action a case and respond to a guest after the initial assessment.
This confusion had real consequences: trainers were spending a disproportionate amount of session time re-explaining process flow instead of building deeper skill. New hires were leaving training sessions with lingering uncertainty that slowed their ramp-up and affected confidence.
The Problem
Noticing this gap, I owned this project end-to-end. From identifying the performance gap, to designing the instructional framework, to building the final deliverables in Adobe Creative Cloud. No template existed. I developed the visual language and structure from the ground up, starting with hand-drawn sketches to rapidly test the concept before bringing it into the classroom.
My Role
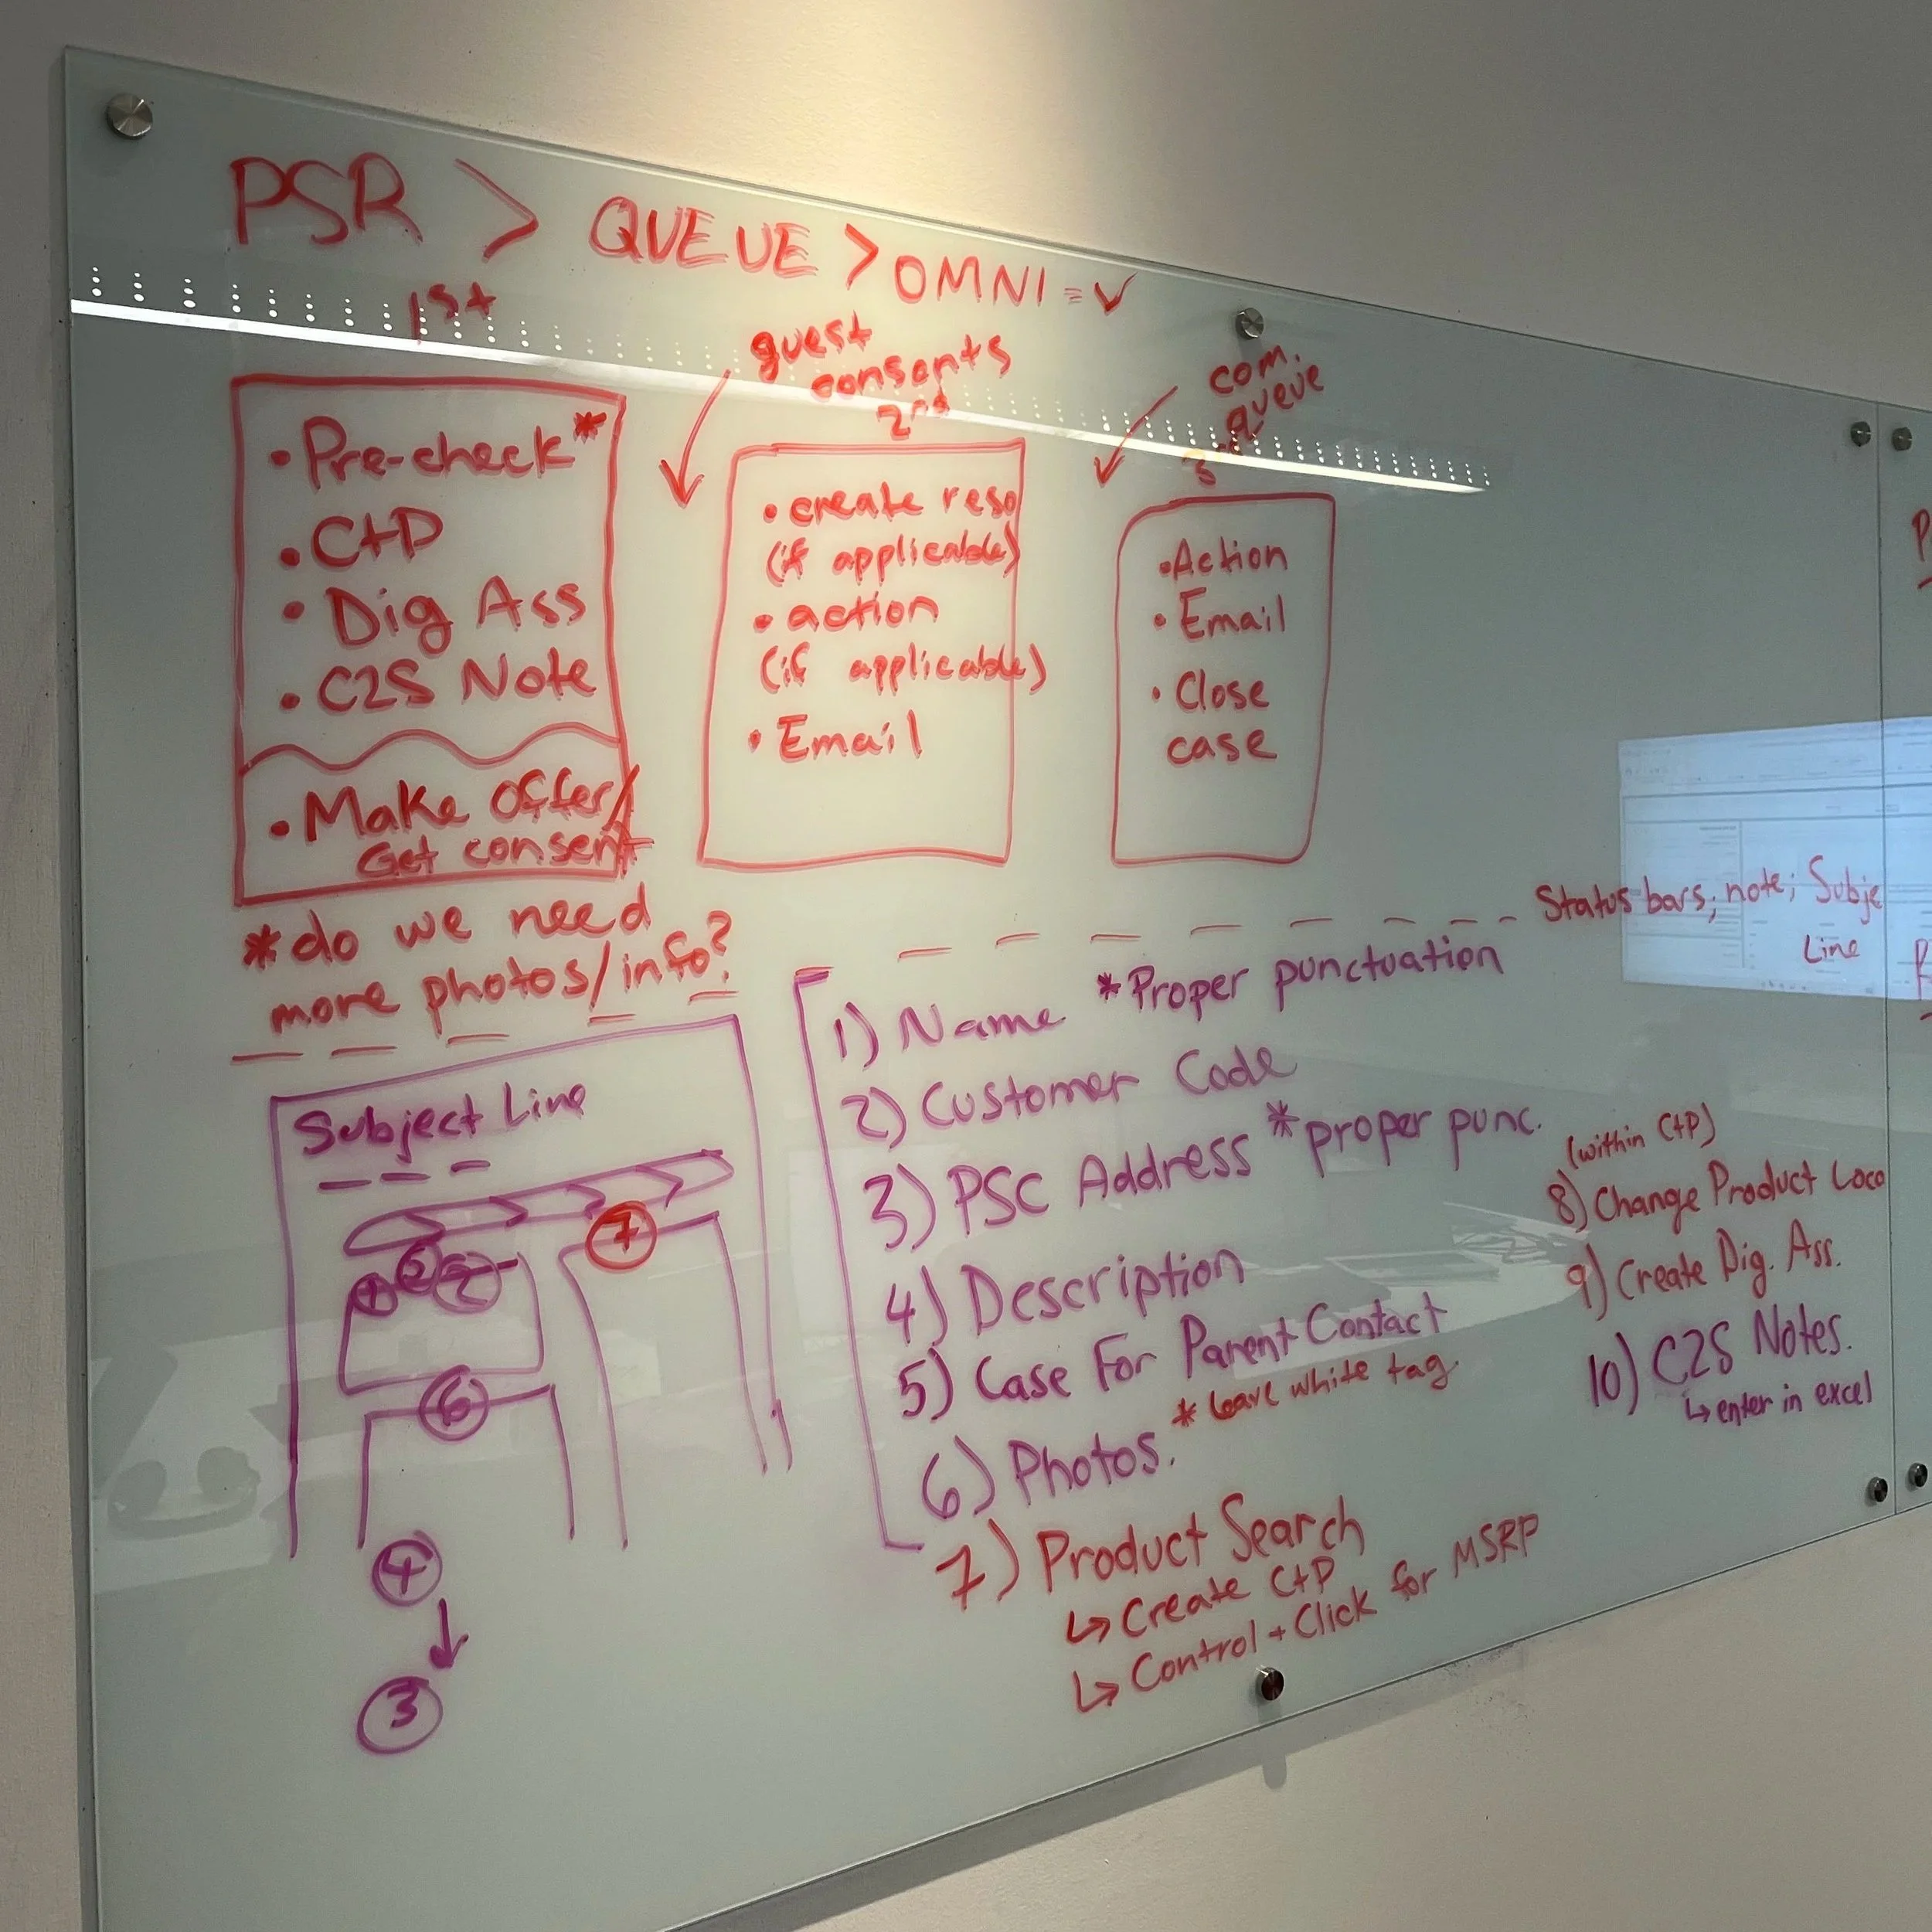
To give the resolution process a consistent visual anchor, I designed a three-touchpoint workflow template applicable across all AfterSales processes (see illustration). The three core components are:
First Touchpoint — Accept a new OMNI, complete the "Pre-flight Checklist," create a Digital Assessment and send the first email communication to the guest
Second Touchpoint — Action and create the resolution (if necessary) based on the guest’s response; share next steps with the guest
Third Touchpoint — Finalizing the process so that we can confidently close the case
The framework used a consistent structure, layout, and visual language across all workflows, so new hires only had to learn how to read it once, then could apply the framework to any guest interaction, regardless of resolution or point in the case progression.
I then built out full workflow visuals for all major AfterSales resolutions and introduced them in a dedicated workshop session toward the end of training, when learners had enough context to connect the framework to their real work.
The Solution
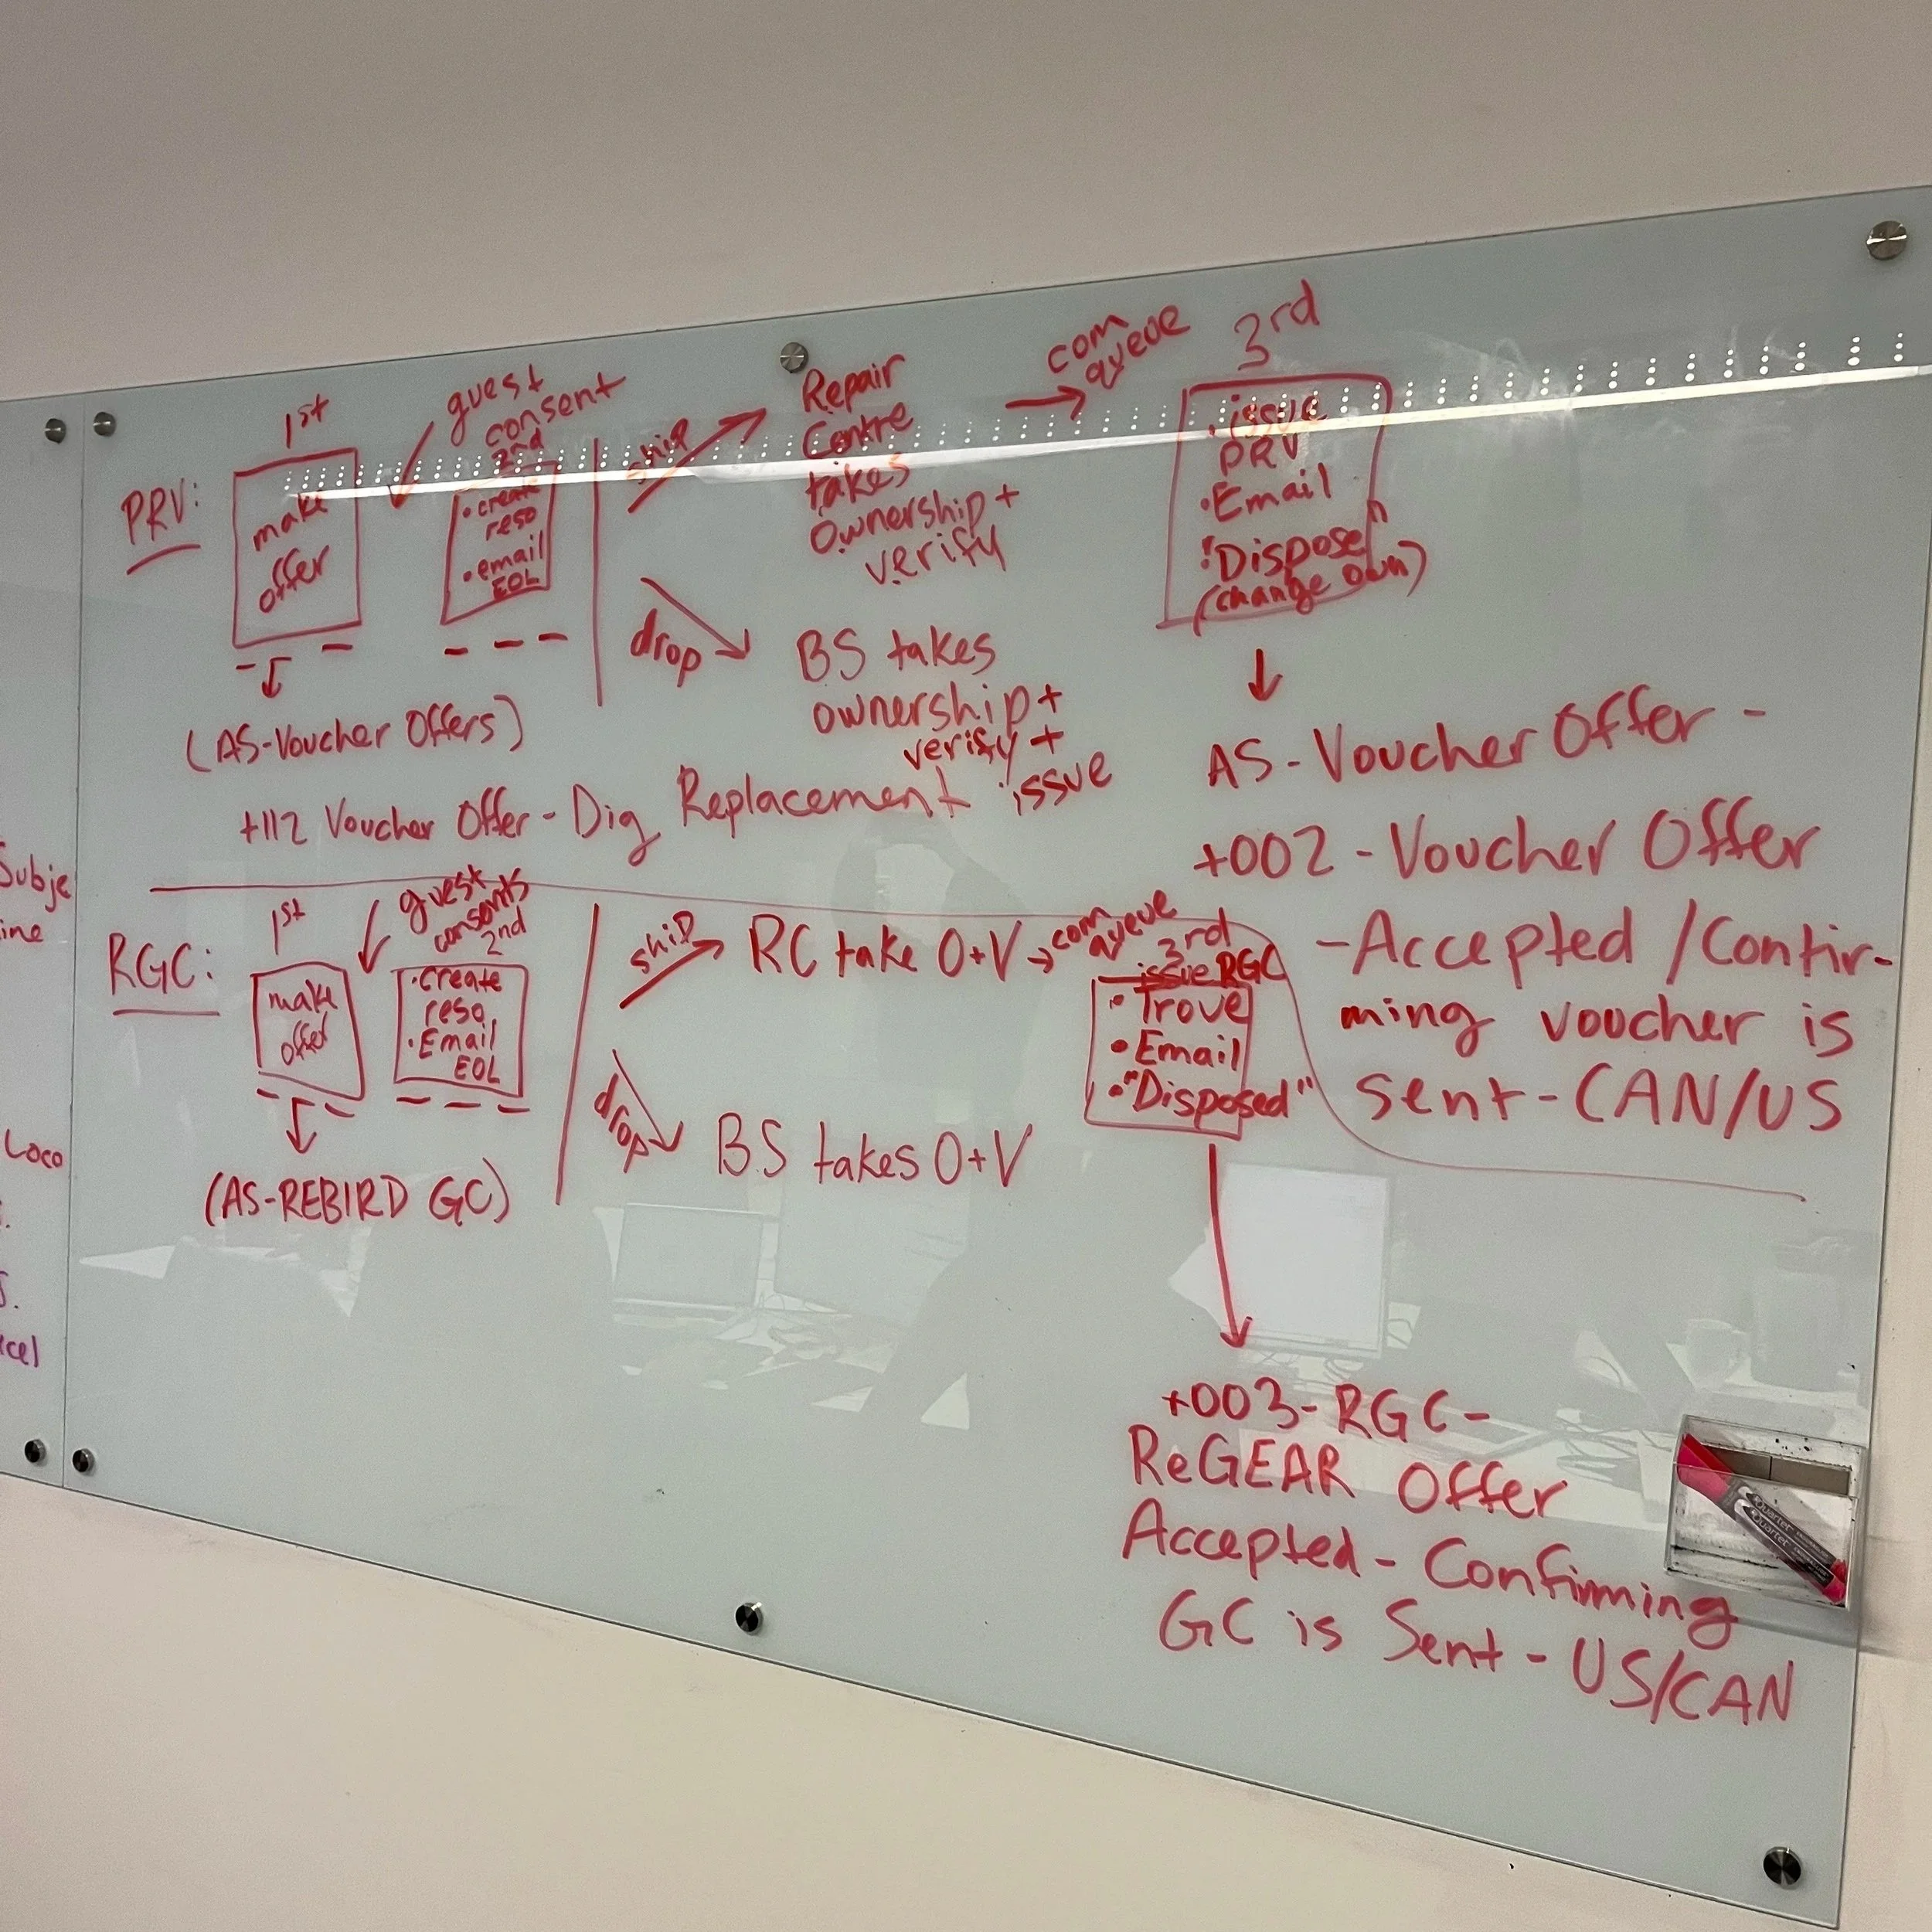
PRV Framework:
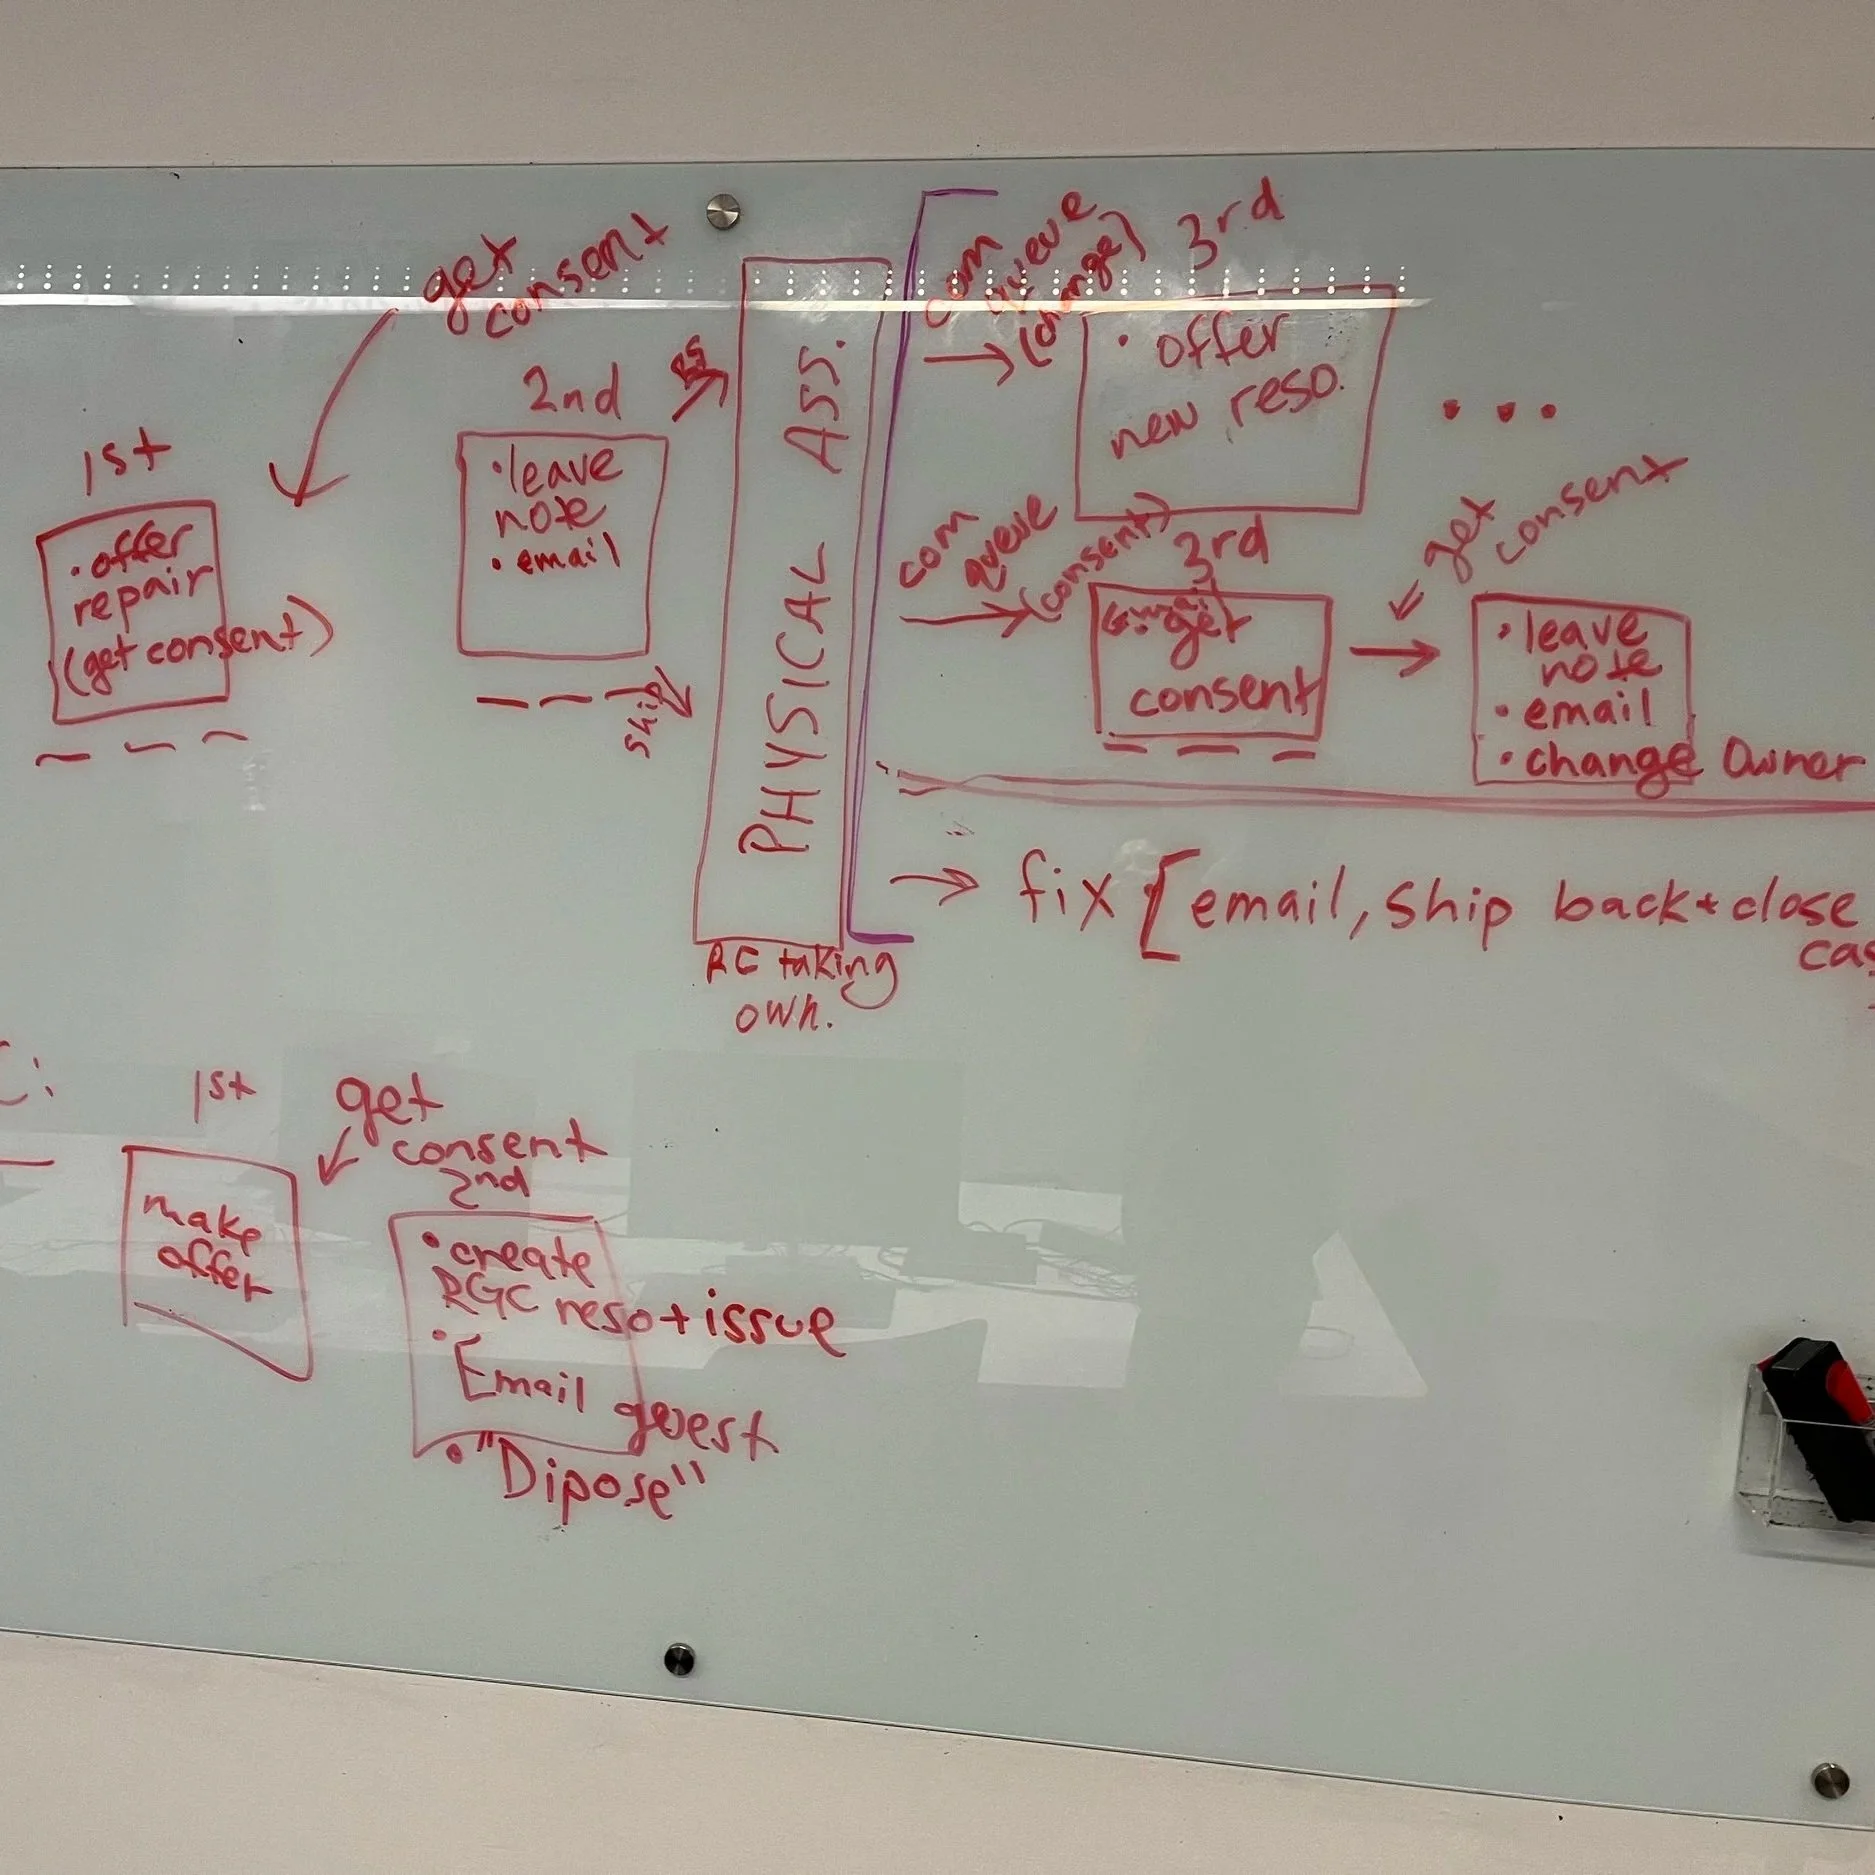
QFP Framework:
Impact
The framework landed immediately. New hires reported that the visuals helped them finally see how everything connects. The workshop gave learners a chance to work through real case scenarios using the framework, which addressed lingering questions that would otherwise have followed them into their first weeks on the job. One new hire put it this way:
“The workshop towards the end of training was so helpful. Laura did amazing at creating these maps on how to tackle a case according to the resolution chosen. It was so nice and I felt way less stressed after that because I think it answered all of my questions.”
The framework was subsequently adopted into the department’s training curriculum as a formal job aid, a recognition that the solution addressed a need that extended well beyond a single cohort.
Example photos from in the classroom:
Key Skills Demonstrated
Instructional Design · Visual Communication · Process Mapping · Performance Gap Analysis · Learning Experience Design · Adobe Creative Cloud